Monday, May 31, 2010

Rose water and white chocolate gateau: For the white chocolate lover...


My sister really love white chocolate, no matter it's a cake, cookie or anything, if it has the white chocolate, my sister will say yes. So it's my mission to try all the possible recipe that contains it, haha, I have to say that I feel like this! 
This time I saw the recipe from the advertisement of the Divine chocolate in the Olive magazine issue March 2010, and I really want to try it. But as you know me, I have a lot (I really mean it, A LOT!) of things which I really want to do, so the cake still in my list but just postponed, until I felt that I should make it or I won't make it a all, -*-. 


The reason for the postponement is the recipe calls for the crème fraîche which is not easy to get, all I have to do is making it by myself, and wait for it to become thick and tangy.
But after I make it I think it's not a must, the crème fraîche will give the cake a tangy taste that contrast to the sweetness of the white chocolate icing. You can use whipped cream with a bit of lemon juice if you want a tangy taste or you can use plain whipped cream that will add richness to the cake, both way the cake will be delicious, too.
Because the base of the gateau is a sponge, the cake best served the day it make, because the sponge doesn't have other kind of fat than the grated white chocolate. 
For the rose water essence it's up to you!, if you don't have it or don't like it just leaves it out and use the vanilla essence instead, believe me, homemade cake will be more delicious as long as you make it with whatever you like!


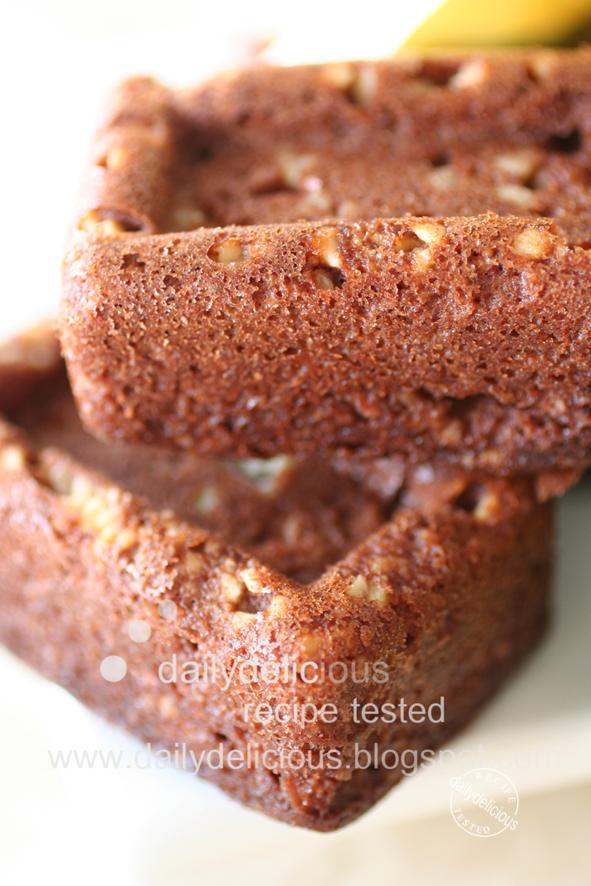
White chocolate gateau
 Serves 12 


CAKE
4 ....................................... Eggs 
125g ................................. Caster Sugar
125g ................................. Plain flour 
50g ................................... White Chocolate, finely grated


ICING
3 tbsps/2-3 drops .......... rosewater or rose essence 
150ml ............................... crème fraîche
200g ................................. White Chocolate , broken into pieces
75g .................................... unsalted butter
3 tbsps ............................. single cream , at room temperature
125g ................................. Icing Sugar 


White Chocolate curls to decorate
Icing Sugar sifted, for dusting


Prepare the Crème Fraîche by mix 1 cup of whipping with 1 tbsp of the yogurt, cover and let it sit on your counter (or any place that is not hot), for overnight, then refrigerate for 1 day before using.
You will get the thick and a little tangy cream. 


• Heat the oven to 180C/fan 160C, butter and line the bases of two 20cm round sandwich tins 


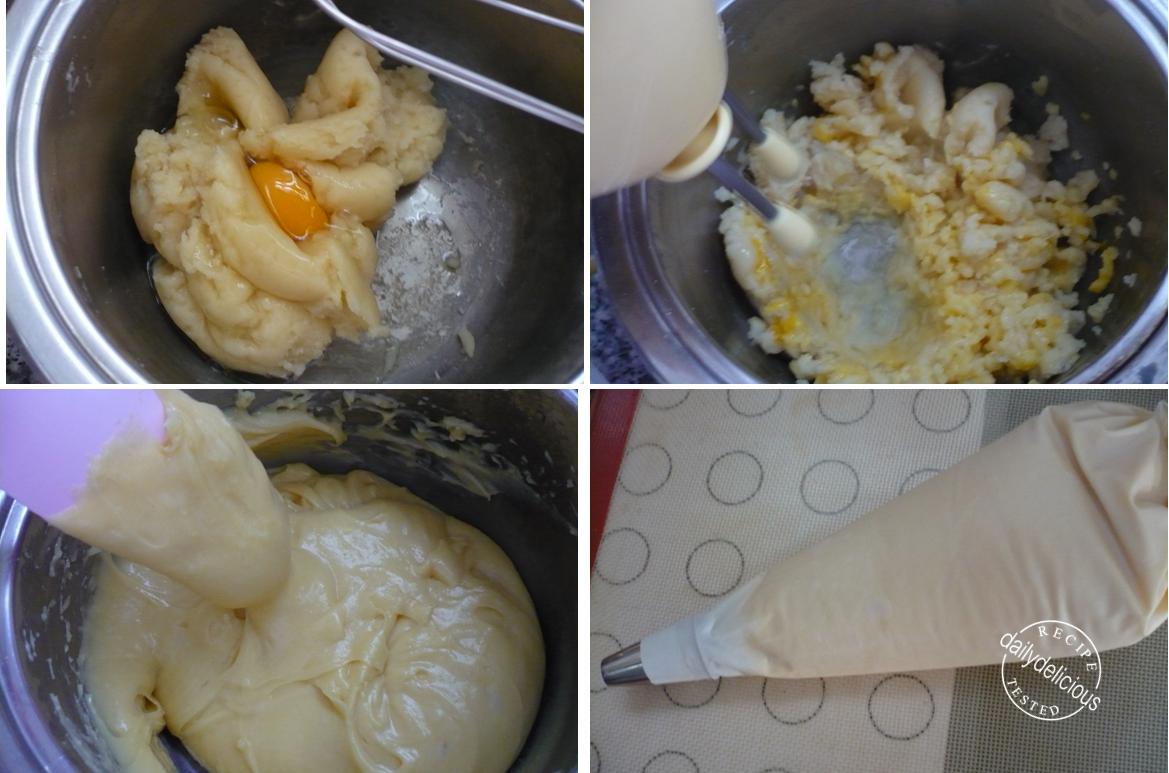
Whisk the eggs and caster sugar together in a large bowl using a hand-held electric whisk until pale and thick enough to leave a trail when the whisk is lifted. Sift the flour into the bowl. Add the grated chocolate and fold everything together with a large metal spoon.
Divide the mixture between the prepared tins and bake for 20 minutes until just firm to the touch. Transfer to a wire rack to cool.


When you ready to assemble:


Stir the rosewater into the crème fraiche.


• Put the white chocolate and butter in a heatproof bowl set over a saucepan of barely simmering water so that the base of the bowl is not touching the water and leave until melted. Allow to cool a little, then stir in the cream and icing sugar and beat until smooth.
Leave the mixture to cool further until thickened.


Use the rose water cream  to sandwich the 2 cakes together on a serving plate.
 Spread the white chocolate frosting over the top and side of the cake.


• Decorate the top of the cake with white chocolate curls.


Rose water and white chocolate gateau: For the white chocolate lover...

Thursday, May 27, 2010

May 2010 Daring Bakers Challenge #40: PIECE MONTÉE


Another month for the Daring Bakers’ challenge, and I have to say I felt sick when I saw the recipe, -*-. Well, most of all I never think about doing this kind of dessert at home 
the croquembouch.  "A croquembouche or croquenbouche is a French cake, a kind of pièce montée often served at weddings, baptisms, and first communions. It is a high cone of profiteroles (choux filled with pastry cream) sometimes dipped in chocolate bound with caramel, and usually decorated with threads of caramel, sugared almonds, chocolate, flowers, or ribbons. They are also often covered in macarons, a small pastry consisting of two layers and a flavored cream or ganache.
The name comes from the French words croque en bouche meaning 'crunch (or munch) in (the) mouth'.The choux buns can also be made with savoury fillings." This is the definition of the croquembouch from the Wikipedia.


So, as the first reason, I'm not in French, and I'm not have a wedding ceremony, haha, I don't see the chance to make it!
Anyway, I find the challenge is an order that I must do (as long as I still want to be the member, hehehe) then I have to find other sources, then I saw that it's more easy to move if you have a pastry as a base (or you can just place the whole PIECE MONTÉE on the plate, but it will make washing the plate more suffer), so I use the Pâte Sucre, which I have it in my fridge, but you can use any recipe that you like.
The other thing that you must have if you want to make the PIECE MONTÉE is the mold, no, I didn't tell you to run out of your home to buy it. You can easily make it using the cardboard and aluminium foil, like the one that I use and the great thing about making it by yourself is you can get the size that you really want ^ ^.


It's not hard to make this kind of dessert, if you can make choux pastry, pastry cream and caramel, but the most important thing to keep in mind is you will have to be very cautious while assemble the PIECE MONTÉE with the caramel, because if the caramel is not not it will solidify but if it's very hot, it can burn your skin. I burn my fingers while making this too, so this is my only warning. Other than this this challenge is a breeze, because my family love to eat the choux pastry and I have done it a hundred time, the point is don't let the color of the pastry fool you, you need the inside of it to be light and airy too, so when the choux pastry is light golden, reduce the temperature and bake for 5-10 minutes more (or open the oven door ajar with a wooden spoon), and check again. If the pastry is light and dry and hold it shape after you taking it out of the oven, it's done!


So, after I have a hard time with a lot of burns, haha, I still think this challenge is great and yes, it's fun! Thank you Cat of Little Miss Cupcake.


The May 2010 Daring Bakers’ challenge was hosted by Cat of Little Miss Cupcake. Cat challenged everyone to make a piece montée, or croquembouche, based on recipes from Peter Kump’s Baking School in Manhattan and Nick Malgieri.


Croquembouche or PIECE MONTÉE
Make one -hight 23 cm wide 18 cm


For this PIECE MONTÉE:
I prepare the mold, by using the cardboard make the cone shape and cover it with foil.


I also made the Pâte Sucre to use as a base, it will be easy to move the PIECE MONTÉE around.


Make Crème Patissiere:


Ingredients:


1 cup (225 ml.) whole milk
2 Tbsp. cornstarch
6 Tbsp. (100 g.) sugar (I reduced the amount to 90g) 
1 large egg
2 large egg yolks
2 Tbsp. (30 g.) unsalted butter
1 Tsp. Vanilla


Dissolve cornstarch in ¼ cup of milk. Combine the remaining milk with the sugar in a saucepan; bring to boil; remove from heat.
Beat the whole egg, then the yolks into the cornstarch mixture. 


Pour 1/3 of boiling milk into the egg mixture, whisking constantly so that the eggs do not begin to cook.
Return the remaining milk to boil. Pour in the hot egg mixture in a stream, continuing whisking.Continue whisking (this is important – you do not want the eggs to solidify/cook) until the cream thickens and comes to a boil. Remove from heat and beat in the butter and vanilla.
Pour cream into a stainless steel/ceramic bowl. Press plastic wrap firmly against the surface. Chill immediately and until ready to use.


Make Pate a Choux 
(Yield: I make a small size, and I got about 40 pieces)


¾ cup (175 ml.) water
6 Tbsp. (85 g.) unsalted butter
¼ Tsp. salt
1 Tbsp. sugar
1 cup (125 g.) all-purpose flour
4 large eggs
For Egg Wash: 1 egg and pinch of salt


Pre-heat oven to 425◦F/220◦C degrees. Line two baking sheets with parchment paper.
Preparing batter:


Combine water, butter, salt and sugar in a saucepan over medium heat. Bring to a boil and stir occasionally. At boil, remove from heat and sift in the flour, stirring to combine completely.
Return to heat and cook, stirring constantly until the batter dries slightly and begins to pull away from the sides of the pan.


Transfer to a bowl and stir with a wooden spoon 1 minute to cool slightly.
Add 1 egg. The batter will appear loose and shiny. (Note: I use electronic hand mixer, it's easy and quick.)

As you stir, the batter will become dry-looking like lightly buttered mashed potatoes.

It is at this point that you will add in the next egg. Repeat until you have incorporated all the eggs.
Piping:
Transfer batter to a pastry bag fitted with a 1 cm open tip  (I make a small size). Pipe choux  3 cm-part in the baking sheets.  Choux should be about 2 cm high about 3cm wide.
Using a clean finger dipped in hot water, gently press down on any tips that have formed on the top of choux when piping. You want them to retain their ball shape, but be smoothly curved on top.


Brush tops with egg wash (1 egg lightly beaten with pinch of salt).
Baking:
Bake the choux at 425◦F/220◦C degrees until well-puffed and turning lightly golden in color, about 13 minutes.

Lower the temperature to 350◦F/180◦C degrees and continue baking until well-colored and dry, about 5 minutes more. Remove to a rack and cool.
Can be stored in a airtight box overnight.


Filling:
When you are ready to assemble your piece montée, using a plain pastry tip, pierce the bottom of each choux. Fill the choux with pastry cream using either the same tip or a star tip, and place on a paper-lined sheet. Choux can be refrigerated briefly at this point while you make your glaze.
Use one of these to top your choux and assemble your piece montée.


Make Hard Caramel Glaze:
(Note: you might need more than one batch)
1 cup (225 g.) sugar
½ teaspoon lemon juice


Combine sugar and lemon juice in a saucepan with a metal kitchen spoon stirring until the sugar resembles wet sand. Place on medium heat; heat without stirring until sugar starts to melt around the sides of the pan and the center begins to smoke. Begin to stir sugar. Continue heating, stirring occasionally until the sugar is a clear, amber color. Remove from heat immediately; place bottom of pan in ice water to stop the cooking. Use immediately.

Assembly of your Piece Montée:


You may want to lay out your unfilled, unglazed choux in a practice design to get a feel for how to assemble the final dessert. For example, if making a conical shape, trace a circle (no bigger than 8 inches) on a piece of parchment to use as a pattern. Then take some of the larger choux and assemble them in the circle for the bottom layer. Practice seeing which pieces fit together best.
Once you are ready to assemble your piece montée, dip the top of each choux in your glaze (careful it may be still hot!), and start assembling on your cake board/plate/sheet. Continue dipping and adding choux in levels using the glaze to hold them together as you build up. (You may want to use toothpicks to hold them in place).
When you have finished the design of your piece montée, you may drizzle with remaining glaze or use ribbons, sugar cookie cut-outs, almonds, flowers, etc. to decorate.


May 2010 Daring Bakers Challenge #40: PIECE MONTÉE

Thursday, May 20, 2010

Chocolate Friands: Quickly and easy snack for chocoholic!

Small piece of chocolate is enough to make your afternoon brighter. But the chocolate will be more interesting when transform it in to something more delicious. 


 But I'm not in the mood of making anything complicated, I just want something quick and yummy, ^ ^. Due to the fact that I have a lot of egg white in the fridge, so the recipe, that use egg white will be great too. So, the searching for the right recipe began, well, it's not so long because I found it in the first book that I reached my hand to, haha. 
The recipe come from , the small book, that full of delicious idea, and most of all full of chocolate,^ ^.
This friand is very easy to make, the only thing that you need to do is mix all the ingredients, and it's done. I add a bit of texture by sprinkle the diced almond on the mold (but if you use the muffin pan, sprinkle the almond on top instead of the bottom).
With the recipe that's so quick and easy to make, "What are you waiting for?" Let's go to the kitchen with me and I promise you will have a great snack in  a very very short time.^ ^


Chocolate friands
Make 16 (4.5x7x2.5 molds)


110g ................................. Almond meal
250g ................................. Icing sugar, sifted
75g .................................... All purpose flour, sifted
30g .................................... Cocoa powder, sifted
½ tsp ................................ Baking powder
5 ......................................... Egg white
200g .................................. Butter, melted
............................................ Diced almond, for sprinkle on top of the friands

Preheat the oven to 160°C (320°F)
If using metal tins, brush the tins with butter.
(Because I use the silicone one, so I don't have to grease the molds, and I sprinkle the almond in the molds).


Place the almond meal, icing, sugar, flour, cocoa and baking powder in a bowl and stir to combine.


Add egg whites and stir to combine. Add butter and stir to combine.


Spoon the mixture into tins and bake for 15-20 minutes or until springy to touch.


Chocolate Friands: Quickly and easy snack for chocoholic!

Sunday, May 16, 2010

Chicken Farm Baker's Project 22: In love with Bagels, Bagel Burgers with caramelized onion.


The time for the Chicken Farm Baker Project again, this month Jib, want all of us to play with the bagel, by baking it and turn it into something delicious, ^ ^.


I made the bagel before, but the first time was not impressive, my first bagel was too chewy, a bit hard and very dense, after that I don't want to make it again, -*-. So, when I know that I have to make the bagel for this month project, I feel nervous, haha, and I think that I want to make it better this time.
I choose the recipe from the book and adapt it to make it softer by adding some of the water and honey. And, yes!, this time my bagel is still chewy but not too much, and softer, most of all it makes me feel a lot better with homemade bagel, ^ ^.
I think about what I want to turn my bagel into, luckily I have a hamburger in the fridge (I made it a week ago, ^ ^, then freeze it, it's a fast dinner, haha), so, when I got both delicious bread (My Bagel, wow) and delicious hamburger patties, the best thing that they should turn it to is the Bagel burgers.
I split the bagel in half, toast it a bit then pile up with rocket, caramelized onion, tomato, then squeeze the Dijon mustard on top and finish my delicious creation with the hamburger patty and cheese.
The chewy bread make the eating this burger more delicious, I suggest serving this yummy burger with cold beer or if you like I having mine with the Barcardi, ^ ^.


Bagel Burger with caramelized onion
Makes 4


Plain bagel


250g ............................. Bread flour
1tsp .............................. Instant yeast
½ tsp ........................... Salt
15g ................................ Sugar
1 tbsp ........................... Honey
150ml ........................... Water


-Water for boiling
2 litre ........................... Water
2tbsp ........................... Honey


..................................... Egg white for brushing 


Hamburger 
(makes 4)


300g ........................... Minced meat
½ ................................ Onion, finely chopped
30g ............................. Butter
15g .............................. Bread crumb
2tbsp .......................... Milk
1 .................................. Egg
½ tsp ......................... Salt
..................................... Pepper, nutmeg 
..................................... Oil for frying

Caramelized onion


2tbsps .......................... Oil
½ cup .......................... Red onion, finely sliced
1..................................... Onion, chopped
8tbsp ............................ Balsamic vinegar
1½ tbsp ....................... Light brown sugar
....................................... Salt, to taste


....................................... Rocket, tomato and Dijon mustard, for serving
....................................... Cheese, sliced


First make the bagel:


Mix the water and the honey together.


Put the bread flour and salt in a bowl, whisk to combine, add the sugar and yeast. Pour the water mixture into the bowl.
Use large spoon (or pastry scraper) to mix everything together, and knead briefly to bring all the ingredients together.
Take the dough out of the bowl and knead.

Knead by using the heel of your hands to compress and push the dough away from you, then fold it back over itself (see the picture here). Until all the dough are moisten.

Give the dough a little turn and repeat. Put the weight of your body into the motion and get into a rhythm. Keep folding over and compressing the dough.

Knead for 10-15 minutes or until the dough is soft, pliable, smooth and slightly shiny, almost satiny, the dough will stop sticking to your hand.


Cover the bowl with a tea towel  or cover with the plastic bag and leave the dough to prove for about 10 minutes.


Prepare the baking sheet by lining with the baking paper or silpat (Note: the bagel quite sticky).
Gently press down the dough and cut the dough into 4 pieces, let the dough rest for 10 minutes.

Preheat the oven to 190°C


Use a rolling pin to roll the dough into a circle. Fold the dough and roll into a small cylinder.


Roll the cylinder into 20 cm long.
Press one end of the dough, join the ends and place fingers through the hole and roll the ends together. Place on a lightly greased surface, cover with a clean cloth, and let rest until risen but not doubled in a draft-free spot, 20 to 30 minutes.


In a medium, heavy pot, bring 2 cups of water and the honey to a boil. In batches, add the bagels to the water and boil, turning, for 15 seconds. Flip bagels onto the prepared sheet pan. 
Brush the bagel with egg white.
Bake for 15 minutes, until golden brown.


Make the hamburger:


Note: in the picture I make 2 batches of the hamburger.


Heat 15g of the butter in the frying pan, add the chopped onion into the pan, and sweat over low heat until soft but not colored.

In a bowl, mix the ground meat, egg, bread crumb, onion, and milk, then season with salt pepper and nutmeg.


Form into hamburger patties.
Put the rest of the butter in the pan. Place patties on the pan, and cook 5 minutes per side, or until well done.

Make the caramelized onion:


Heat the oil in a frying pan over a low to medium heat. Add the onions and sweat over a low heat until soft but not colored.
Turn up the heat and allow the onions to become caramelized and start to brown. Add the vinegar and the sugar, stir gently and continue to cook over a medium heat, so that the vinegar begins to reduce.
Let the mixture boil until the vinegar has become thick and sticky and coats the onion.


Make the Bagel Burger:


Slice the bagel and toast for 5 minutes, (or more ^ ^).
Place the rocket, caramelized onion, sliced tomatoes and brush (or squeeze) the mustard on top. Finish with the hamburger and cheese and top with the bread.


Serve warm with everything you like, for me I serve my with a bottle of Bacardi Breezer , haha.


Chicken Farm Baker's Project 22: In love with Bagels, Bagel Burgers!

Tuesday, May 11, 2010

Crispy....Sweety....Salty Sesame Cookies


Crunchy and addicted, well this is the description for this cookie. I got this recipe from my friend, after she baked this cookie on a third time (so, she didn't have to tell me how delicious it is, haha).
She called me one day and told me that "Pook, you has to bake this, I love it, and it's delicious, blablabla...", I waited for her to stop talking so I could say "Send me the recipe right away!" 
And yes, this cookie is great as she said, the black sesame seed has a little bitter taste that makes eating the cookie more addicted, the texture of the cookie is crunchy, and the smell is divine too. I bake only half of the original because I forgot to buy the sesame,^ ^", and if you notice I have to use the white sesame seed in my cookie too. But if you have a lot of people waiting for your creation, haha, I suggest making a full batch, it's very good, you can keep it in an air tight container for up to a week, (but I'm sure that you will run out of the cookie sooner than that, ^ ^).
 Anyway I still feel that this cookie is great when served it with a cup of hot Chinese tea, the aroma of the tea and the sesame are a good couple.
My friend and I made some adaptation from the original recipe, as the original recipe using the dipping method to cover the cookie with the sesame, by rolling the cookie dough into a ball, then dip the cookie in milk and roll it in the sesame seed bowl, the result is a mass work space, haha, and too little sesame in the cookie. So, we decide to add all the sesame into the cookie dough, the result is delicious crunchy cookie, that I think you will love it too.


Sesame Cookies
Makes about 50 cookies


260g ............................ all–purpose flour
100g ............................ sugar
½ tbsp ........................ baking powder
½ tsp .......................... salt
60g .............................. unsalted butter, at room temp.
60g ............................... solid veg. shortening
1 ................................... large egg, at room temp.
½ tsp .......................... vanilla extract
½ tsp .......................... grated lemon zest
140g ............................ unhulled sesame seeds


1. Preheat oven to 375°F 
Prepare the baking sheet, by lining with the baking paper or Silpat.


2. Stir together the flour, sugar, baking powder, sesame seed and salt. On low speed, sitr in the butter and shortening a little at a time until the mixture resembles coarse crumbs.


3. In a medium bowl, whisk the egg, vanilla and lemon zest. Stir the egg mixture into the dry ingredients until smooth and well blended, about 2 minutes (the texture will be crumbly, but you can press it together). Cover the dough with plastic wrap and refrigerate 1 hr.


4.     Roll the dough into 0.5cm thin then cut with the cookie cutter.
5. Place the cookies on the baking sheet. Continue with the remaining dough, placing the cookies 1 inch apart.

7. Bake for 18 minutes or until well browned.


Crispy....Sweety....Salty Sesame Cookies

Printfriendly

Related Posts Plugin for WordPress, Blogger...