Friday, August 27, 2010

August 2010 Daring Bakers Challenge #43: Baked Alaska

The Daring bakers again, ^^, and yes this month I didn't skip. Last month, due to all the thing in life (travel, eat, shop and etc. I really had no time to join the challenge). 


For this month, Elissa (of 17 and Baking), gave us a choice, we can make Baked Alaska or Ice Cream Petit Fours, which first I decided to make both of them. But there are many thing in life that you can predict, I couldn't finish the Ice Cream Petit Fours even it's in my freezer, waiting for the last step - the chocolate glaze!!!!
Anyway, I feel good that I start the Baked Alaska first and can finish it, because it's the one that I never make it before, so it's fun to try something new, haha.


The Baked Alaska is the combination of, buttercake, ice cream and the meringue, and then put it in the oven to bake (the meringue) until light golden. But if you have a blow torch it will be easier, and you don't have to be afraid that the ice cream will be melt before the meringue become brown. 
Even the host of this month give a lot of variation, I choose to make the basic one, the vanilla ice cream, which turn out to be very good, (actually I have this book too, but I didn't try this recipe before). But the recipe that I have to say "Wow" is the brown butter pound cake, it's very good. The texture is soft, moist and the taste is awesome!!!! That's the reason why I want to make the ice cream petit four too, anyway, I love this cake, I think it's because of the butter that we remove the water content out (by boiling it and burn the milk segment), so the butter becomes something like shortening (the shortening has no water at all) so, the cake texture is lighter.


Anyway, the cake become a bit dense after freezing, but it's not bad when you eating it with an ice cream, and I have to say it's delicious!, haha.
So, thank you Elissa of 17 and Baking, for this challenge and great recipe.


The August 2010 Daring Bakers’ challenge was hosted by Elissa of 17 and Baking. For the first time, The Daring Bakers partnered with Sugar High Fridays for a co-event and Elissa was the gracious hostess of both. Using the theme of beurre noisette, or browned butter, Elissa chose to challenge Daring Bakers to make a pound cake to be used in either a Baked Alaska or in Ice Cream Petit Fours. The sources for Elissa’s challenge were Gourmet magazine and David Lebovitz’s “The Perfect Scoop”.


Baked Alaska 
Make 8-9 (6 cm mold)


Vanilla Ice Cream


1 cup (250ml) whole milk
A pinch of salt
3/4 cup (165g) sugar
1 vanilla bean, split lengthwise OR 2 teaspoons (10ml) pure vanilla extract
2 cups (500ml) heavy (approx 35% butterfat) cream
5 large egg yolks
1 teaspoon (5ml) pure vanilla extract


1. Heat the milk, and salt  in a medium saucepan  until the liquid steams. Scrape out the seeds of the vanilla bean with a paring knife and add to the milk, along with the bean pod. Cover, remove from heat, and let infuse for an hour. (If you do not have a vanilla bean, simply heat the milk, and salt in a medium saucepan until the liquid steams, then let cool to room temperature.)
2. Set up an ice bath by placing a 2-quart (2 litre) bowl inside a large bowl partially filled with water and ice. Put a strainer on top of the smaller bowl and pour in the cream.
3. In another bowl, lightly beat the egg yolks and sugar together. Reheat the milk in the medium saucepan until warmed, and then gradually pour ¼ cup warmed milk into the yolks, constantly whisking to keep the eggs from scrambling. Once the yolks are warmed, scrape the yolk and milk mixture back into the saucepan of warmed milk.


Cook over low heat. Stir constantly and scrape the bottom with a spatula until the mixture thickens into a custard which thinly coats the back of the spatula.
4. Strain the custard into the heavy cream and stir the mixture until cooled. Add the vanilla extract (1 teaspoon [5ml] if you are using a vanilla bean; 3 teaspoons [15ml] if you are not using a vanilla bean) and refrigerate until thoroughly chilled, preferably overnight.
5. Remove the vanilla bean and freeze in an ice cream maker. If you don’t have an ice cream maker, you can make it without a machine. See instructions from David Lebovitz

Brown Butter Pound Cake


19 tablespoons (9.5 oz) (275g) unsalted (sweet) butter
2 cups (200g) sifted cake flour
1 teaspoon (5g) baking powder
1/2 teaspoon (3g) salt
1/2 cup (110g) packed light brown sugar
1/3 (75g) cup granulated sugar
4 large eggs
1/2 teaspoon pure vanilla extract


1. Preheat the oven to 325°F/160°C and put a rack in the center. Butter and flour a 9”x9” (23cmx23cm) square pan, (I line it with baking paper ^^).
2. Place the butter in a 10” (25cm) skillet over medium heat (I use sauce pan). Brown the butter until the milk solids are a dark chocolate brown and the butter smells nutty. (Don’t take your eyes off the butter in case it burns.) Pour into a shallow bowl and chill in the freezer until just congealed, 15-30 minutes.


3. Whisk together cake flour, baking powder, and salt.
4. Beat the brown butter, light brown sugar, and granulated sugar in an electric mixer until light and fluffy, about 2 minutes. Beat in the vanilla extract then the eggs one at a time, mixing well.
5. Stir in the flour mixture at low speed until just combined.


6. Scrape the batter into the greased and floured 9”x9” (23cmx23cm) square pan. Smooth the top with a rubber spatula and rap the pan on the counter. Bake until golden brown on top and when a toothpick inserted into the center comes out clean, about 25 minutes.
7. Cool in the pan 10 minutes. Run a knife along the edge and invert right-side-up onto a cooling rack to cool completely.


Assembly Instructions – Baked Alaska


1. Line four 4” (10cm) diameter tea cups with plastic wrap, so that plastic wrap covers all the sides and hangs over the edge. Fill to the top with ice cream. Cover the top with the overhanging plastic wrap and freeze for several hours, or until solid.
Note: I use silicone pudding mold to make smaller size dessert, if you follow my method you will get about 8-9 Baked Alaska.


Note: I use 6 cm cutter to cut the cake.


Unwrap the ice cream “cups” and invert on top of a cake round. Trim any extra cake if necessary.


Meringue (For the Baked Alaska)

8 large egg whites
½ teaspoon (3g) cream of tartar
½ teaspoon (3g) salt
1 cup (220g) sugar


Beat the egg whites, cream of tartar, and salt on high speed in an electric mixer until soft peaks form. Beat in the sugar gradually in a slow stream until stiff peaks form.


Pipe the meringue over the ice cream and cake, or smooth it over with a spatula, so that none of the ice cream or cake is exposed. Freeze for one hour or up to a day.


Burn the tips of the meringue with a cooking blow torch. Or, bake the meringue-topped Baked Alaskas on a rimmed baking sheet in a 500°F/260°C oven for 5 minutes until lightly golden. Serve immediately.


August 2010 Daring Bakers Challenge #43: Baked Alaska 

Wednesday, August 25, 2010

Triple chocolate cookies: Comfort me with chocolate cookies!


For me, I'm really happy when I making all these things cookies, cakes, tarts, pies, etc., well everything! So, when I see all the things which I posted in my blog, I always think, wow I bake a lot, haha. But I think that there are a lot of thing that I still didn't have a chance to try.


I love to bake the cookie, too, it's quick, easy and well, delicious, having a jar of delicious cookies on the counter will make everyone happy and I know you never bored of this kind of cookie, ^^ , me too.  
I choose to make the chocolate cookie, (ok, I don't have to tell you why, ^^) with the recipe from.......... (this is the third recipe from this issue). What can I say about this cookie, it's packed with all the chocolate, milk chocolate in the batter (and drizzle on top), with plain and white chocolate chunk. 


Actually I make it for my sister (who  doesn't like the bitter taste of the chocolate), but I always want her to try, because from the recipe, you can use different kind of the chocolate. Like this time, I don't want the cookie to be bitter, so I use the 50% cocoa mass chocolate for the plain chocolate. But if you like more bitterness, you can use the higher percentage. It's the privilege of baking your cookie at home ^^, you can put all the thing that you like into the cookie.
So, today, I want to stay away from a lot of equipment, all I need is warm and delicious aroma of the cookie, that fill my home, and a delicious cookie that will comfort everyone who taste it. 


Triple chocolate cookies
Makes 24


100g ..................................... Soft brown sugar
100g ..................................... Golden caster sugar
100g ..................................... Butter, softened
1 ............................................ egg
1tsp ....................................... vanilla extract
225g ..................................... all purpose flour
140g ...................................... Milk chocolate, melted
85g ........................................ White chocolate chip or chunks
85g ........................................ Plain chocolate chip or chunks 


1. Heat oven to 200 °C. Line 1-2 baking sheets with baking parchment. 


Beat the sugars and butter together, then add the egg, vanilla,and half of the melted milk chocolate and mix together.


 Stir in the flour, white and plain chocolate, stir until combine, then use an ice-cream scoop or round tablespoon to scoop out the balls of cookie dough and drop them straight onto the trays.


2. Bake in batches for 8-9 minutes until pale golden and still soft to touch- they will firm up as they cool. Carefully transfer to a wire rack as soon as they can be lifted up, then drizzle with the remaining melted chocolate.


Triple chocolate cookies: Comfort me with chocolate cookies!

Sunday, August 22, 2010

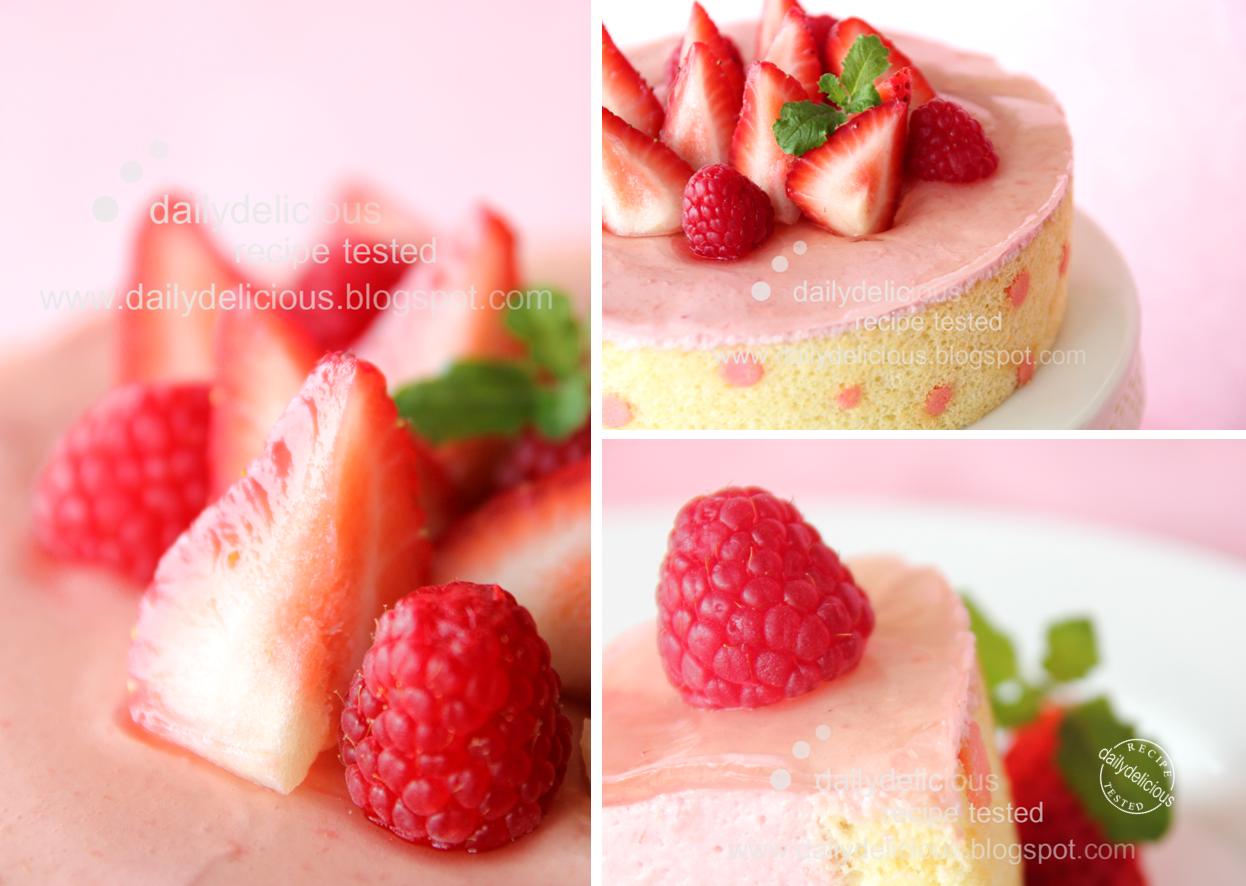
Raspberry Mousse Cake:Give it a try, why don't you make it today?

I believe that most people always think that this kind of cake will be very hard to make, but believe me, it's easy if you really want to.
This kind of cake is an assemble of many elements, like sponge cake (this cake is Joconde), the mousse, and syrup. It's not hard if you can do all of this, you will be able to crate many kinds of lovely dessert (or show pieces , haha).  


I didn't think that I'm good at this and I have to learn and practice more and more, because I didn't have a chance to go to the baking school even I really want to but well, we have to accept that we can't get everything that we want in our life ^^. So, for me baking and more baking at home is both fun and fulfill my passion.
All I want to tell you is "Don't be afraid to try it". There is nothing that is hard to do if you really want to. 
For this time, I love the look of this dessert and after reading, I want to give it a try. 
About this dessert, the base of the mousse contains the Italian meringue which will make the mousse lighter in both texture and taste. If you never making the Italian meringue before, it may be the right time to try ^^, and after this you will be happy to know that you can make many kinds of lovely dessert with Italian meringue base.
For the apricot glaze, you can use the strained apricot jam instead, but it will have a bit of light brown color than clear like this one.
I love the taste of this mousse, not too sweet and the texture is very light. The Joconde biscuit is good too, it's not dry like other kind of the sponge cake and great when combine it with the mousse
So, after I make a lot of persuasion I think you are ready to give this cake a try, right? ^^You will fine it's easier than you imagine, believe me.


Mousse aux Framboises
Make one (15cm cake)


Biscuit Joconde
3 ...................................... Egg whites
60g ................................. Sugar
50g ................................. Almond powder
50g ................................. Icing sugar
1 ...................................... Egg
3 ...................................... Egg yolks
45g .................................. Cake flour
-Pâte à decor
   20g ................................. Unsalted butter, soften
   20g ................................. Icing sugar
   15g .................................. Egg white
   20g ................................. Cake flour
   ......................................... Red food coloring


Meringue Italienne
50g ................................. Egg whites
100g ............................... Sugar
20cc ................................ Water


Mousse au Framboise 
100g ............................... Raspberry puree
3g .................................... Gelatin
80g ................................. Meringue Italienne
60cc ................................ Whipping cream


Simple syrup
50cc ................................  sugar 

50g .................................. water


Kirsch Syrup
50cc ................................ Simple syrup
20cc ................................ Kirsch


Filling
6 ...................................... Small size raspberry 


Nappage neutre
50g ................................. Nappage neutre (I use apricot glaze)
20cc ............................... water


Topping
......................................... Strawberry and raspberry


Make the Biscuit Joconde:


Preheat the oven to 200 °C.
Line the 30x30cm pan with baking paper.
Mix together almond powder with the icing sugar, set aside.
Sift the flour, and set aside.


Make the pâte à decor:


Beat together all the ingredient until smooth and put the batter into the piping bag and pipe the small dots over the pan.


Beat egg whites until soft peak form, add half of the sugar, a little by little, and beat  until stiff peak form.


Beat egg yolks and whole egg with almond powder, the icing sugar and the rest of the sugar and until light and thicken.
Add 1/3 of the meringue with half of the flour, fold to combine, add 1/3 of the meringue with the rest of the flour and fold to combine, then add the rest of the meringue. 


Fold until fully combine.


Pour the batter into the prepared pan and bake for 10 minutes or until golden.
Peel the baking paper and let the biscuit cool.
When the biscuit cool completely cut into 2 -4 cm stripes, and 1 -12cm round.  


Set the biscuit into the 15 cm cake pan, or cake ring.


Make the Simple syrup:


Put the water and sugar into small saucepan and bring to boil, until all the sugar dissolved, take off the heat and let the syrup cool.

Make the Italian meringue:

In a sauce pan, put the sugar and water and bring to boil over medium low heat.
When the syrup reaches 100°C, start whisking the egg whites.
The syrup is ready when it reaches 117°C; pour it over the egg whites and continue whisking until cold.


Make the raspberry mousse:


Bloom the gelatin in cold water for 3-5 minutes.
Put 50g of the puree into the microwavable glass or bowl, and heat for 30 seconds to 1 minute or until hot, put the gelatin in hot puree, stir to dissolve.
Mix the hot puree with the rest of the puree and let it cool.


Beat the whipping cream until soft peaks form.


Mix the puree with the Italian meringue and fold to combine. Pour the raspberry mixture into the whipped cream and fold to combine.

Mix 50 cc of simple syrup with the Kirsch and sprinkle over the cake.

Pour half of the mousse into the pan and place the small raspberry inside, and pour the rest over it.
Smooth the top and refrigerate for 12 hours.

Melt the glaze with the water, warm the glaze mixture and pour over the mousse, leave to set in the refrigerator for about an hour.
Decorate with the strawberry and raspberry, before serving.


Raspberry Mousse Cake:Give it a try, 
why don't you make it today?

Printfriendly

Related Posts Plugin for WordPress, Blogger...